
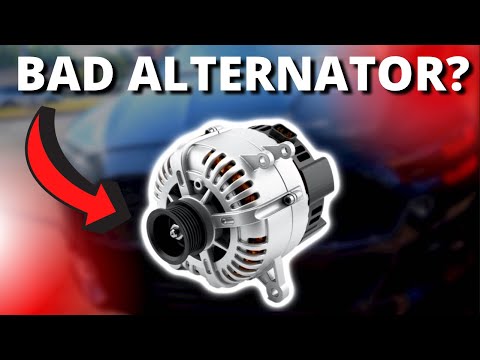
Your car’s alternator plays a critical role in charging the battery to ensure that the car has the voltage needed to generate a spark in the spark plugs and power all the other electrical accessories. If your alternator starts to go bad, it tends to first affect the performance of your car’s electrical system, with dimming lights and slow-moving power windows.
A bad alternator can eventually start to affect engine performance. Early on, it causes hard starts, and eventually, the engine can stall with little warning, leaving you without the power to restart it.
If you’ve been noticing these telltale signs of an alternator problem, you’re probably wondering what’s causing your alternator to go bad and what, if anything, you can do about it.
If your car is more than seven years old, it might just be that the alternator has worn out with time. Most only have a lifespan of seven years or around 80,000 miles. However, other things can cause an alternator to go bad or hasten its premature death. This includes things like improper jump starting, poor maintenance habits, or oil getting inside the alternator housing.
To understand what’s causing your alternator problems and what you might be able to do about it, we’ll first need to delve deep into the most common faults and mechanical failures.
6 Signs of a Bad Alternator
Alternator problems can be easily confused as being battery issues, as the two work together to power the car’s entire electrical system. They both share symptoms of failing, such as:
However, the one symptom that most easily sets a bad alternator apart from a dying car battery is the engine stalling out when the battery is disconnected or the engine stalling out even after a successful jump start.
If you suspect your alternator is bad, but your battery is good, you can perform a simple layman’s test.
If the engine faults, stalls, or dies within a minute or two of removing the black negative cable, then your alternator is likely bad or dying. If the engine seems to run poorly, it likely means the alternator has started to fail but hasn’t completely died yet.
You can also take your car to a local battery or auto parts store. Most will test your battery for free with a multimeter. If the battery reads that it’s good, then the symptoms you’re experiencing are likely a bad alternator. Some auto parts stores will also test your alternator for you, but they might request that you remove it for a complete bench test.
If you have a multimeter or a voltmeter, you can easily test the battery and alternator yourself in just a few minutes.

5 Common Causes of Alternator Problems
Excess wear and tear over time is the most common reason why an alternator goes bad. Though improper jump-starting techniques, over-straining the alternator’s charging capacity and oil getting onto internal components can bring about an alternator’s premature death.
1. Normal Wear & Tear

The alternator has an average lifespan of 80,000 to 125,000 miles before it starts to fail. This translates into roughly seven years of good performance. If you’re noticing signs of a bad alternator and your car is more than seven years old or has more than 80,000 miles on it, then it might just be that the alternator has come to the end of its natural life.
2. Improper Jump-Starting

Mistakes when jump-starting a car are another one of the more common causes of alternator failure. Suppose you accidentally put red to black or vice versa on either vehicle. In that case, the change in electrical current can cause immediate damage to the vehicle’s alternator delivering the charge. This is because the diodes inside an alternator aren’t designed to handle voltage and current delivered in the reverse direction.
More than one person has gone to help someone with a dead battery on the side of the road only to have that person put the jumper cables on their own car incorrectly. Thus, damaging the helpful person’s alternator is an ultimate insult to injury.
While it’s still a good thing to help someone who needs a jump-start, the wise move is always to connect all four jumper cable clamps yourself to ensure your alternator doesn’t get bitten.
3. Using an Alternator as a Secondary Battery Charger

The strain can lead to premature death if you’ve recently used your car’s alternator and battery to charge an accessory 12 Volt battery. More than one fisherman or primitive camping enthusiast without a generator has gotten the bright idea to connect their car’s alternator to a trolling motor or RV house batteries in hopes of getting a quick recharge.
You might be able to get away with this improvised “Bush Fix” charging once or twice, but the strain it puts on your alternator will eventually damage it, and it isn’t worth it.
4. An Overly Tight Serpentine Belt

If you’ve recently replaced your car’s serpentine belt and you accidentally set the tensioner arm too tight, it can gradually damage the alternator pulley. The serpentine belt powers the alternator as it moves through its cycle with the power created by the engine.
If you set the tensioner pulley too tight or use a slightly smaller aftermarket serpentine belt, the stress on the alternator’s pulley wheel and the excess friction on the internal rotor can cause severe wear inside the alternator.
This can even cause the alternator to charge improperly at first. If the alternator can still spin freely, it can lead to overcharging, delivering too much voltage to the battery. If the pulley of the internal rotor starts to seize due to the tension, it can fail to deliver sufficient charge.
In a scenario like this, the excess tension between the serpentine belt and the alternator pulley will likely cause squealing sounds as it slips over the pulley. You might also notice strange burning rubber odors from the excess stress on the belt or wiring inside the alternator being damaged by heat.
As time passes, you might also notice a grinding or a metallic rasping sound as the alternator bearing fails. If you catch it early, you might be able to adjust the tensioner arm or replace the serpentine belt with a slightly larger one.
5. Fluid Leaks on the Alternator

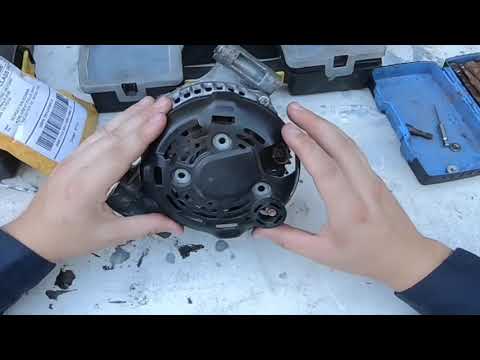
Even something like an accidentally stray drop of oil from the end of a dipstick or a few drops of spilled coolant getting in the alternator can cause it to fail. The moving parts inside an alternator do not work well with fluids and outside lubricants.
A boiled-over radiator, a failure in the high-pressure hose of the power steering system, or a bad front main oil seal also causes their alternator to go bad.
In particular, oil and power steering fluid can foul an alternator’s internal workings. They tend to form a film on the alternator’s housing, windings, slip rings, and carbon brushes that prevent it from developing sufficient charging voltage. You’ll likely also notice a strange smell of burning oil coming from the alternator itself.
Sometimes, you can fix a problem like this by thoroughly cleaning the alternator.
6. Dust & Grime

Excess dust, grime, and particulate matter that get into the alternator can ruin it in various ways. If you live on a dirt road or frequently have to drive in very dusty conditions, airborne particles can gradually start to build up inside the alternator.
This can start to damage the alternator bearing, impede the alternator rotor, or even clog the internal brushes. Any one of these can lead to performance issues seen throughout your car’s electrical system.
In many of these cases, the signs of the failing alternator can be subtle. As the build-up worsens, the alternator’s ability to charge the battery will diminish.
You’ll probably also experience strange grinding or metallic rasping noises from the alternator bearing failing. You might also notice strange burning smells from the clogged brushes starting to overheat.
If you catch a problem like this early enough, you can clean the dust and debris away without replacing the alternator.
How to Deal with Alternator Problems
The underlying fault causing your bad alternator will factor heavily into what you need to do to fix it. Most, but not all, of the time, you have to choose between rebuilding or replacing the alternator. However, this might not be the case if you catch a problem early or if the alternator is going bad due to internal contamination.
Dealing with Oil & Fluids in an Alternator
If your bad alternator symptoms are due to oil, power steering fluid, coolant, or some other liquid getting into the alternator, you might be able to clean it. This typically requires removing the alternator to drain the oil/fluids before cleaning it with an electrical cleaning spray. Even after the following steps, you might still be left having to replace or rebuild the alternator.
The different angles will ensure that any loose oil or grease is out of the equation.
You may have to repeat steps 6 and 7 up to two more times. If you still notice signs of grease fouling the alternator, it is likely too contaminated by oil to be cleaned and needs to be replaced.
If it’s merely the brushes that are contaminated by oil, you might be able to replace the brushes as part of a partial alternator rebuild.
Dealing with Dust Contamination in an Alternator

Dust and airborne particulate matter can clog the brushes and impede alternator performance. If you catch it early and you don’t hear any grinding noises indicating a problem with the alternator bearing, you might be able to clean it.
The trick here is to avoid any fluids. Water and brake cleaner will gum the dust-up, clogging the brushes and caking the particulate matter onto the minute surface textures.
The following steps are your best bet for removing dust and particulate matter build-up from inside an alternator:
Use canned air or a shop air compressor to spray the dust off the brushes. Try to work at angles that blow the particles away without necessarily blowing them into the brushes.
Dealing with an Overly Tight Serpentine Belt
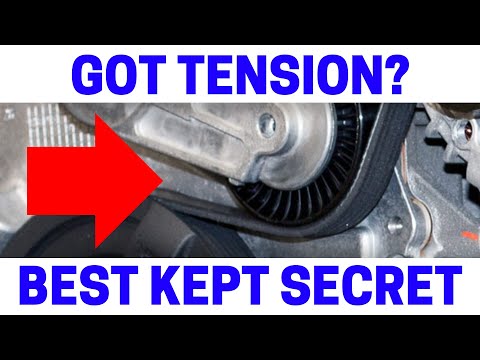
If you recently replaced your serpentine belt and it’s causing problems for your alternator pulley, your car has a tensioner arm, which must be adjusted to reduce the tension minutely. If you have a newer car with an automatic tensioner, you’ll need to replace the entire belt with a slightly larger one.
Rebuilding or Replacing the Alternator
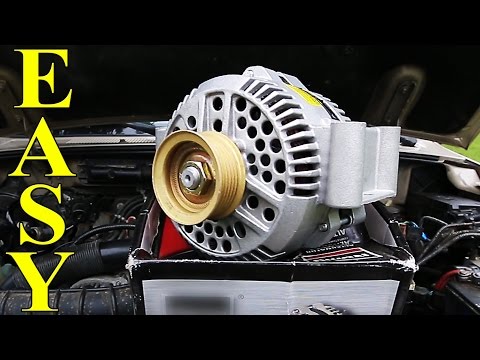
Most of the time, when an alternator goes bad you have to choose between rebuilding it or replacing it. Back then, rebuilding an alternator was cheaper, but you usually have to pay a mechanic to handle it.
The part prices for a new alternator have decreased in recent years. To the point that you can have a mechanic replace your alternator for around $300 in parts and labor, which would be roughly the same if they rebuilt it. Only you get the peace of mind of knowing everything in the alternator is in perfect working order.
If you’re a reasonably capable DIY mechanic, you could even try replacing your own alternator for a part cost of around $125 to $150.
Frequently Asked Questions
Can a bad alternator damage my car battery?
If you have a bad alternator that allows the car battery to get below 50% or lower, it can start to damage the battery’s internal components, drastically shortening battery life. The longer you let a bad alternator go, the more likely you will need a new battery.
Can I clean my alternator with brake cleaner?
On the one hand, brake cleaner does a good job of removing oil from a lot of components. However, it’s a poor choice for cleaning oil or other fluid residues from the alternator. You can try it as a last-ditch hope for cleaning the alternator, but you have to ensure that you do not get a single drop on the alternator-bearing housing. It can degrade the alternator bearing, causing problems far worse than oil-gummed alternator brushes.
Conclusion
Normal wear and tear can cause an alternator to go bad around 80,000 miles or seven years of age. Though improper jump-starting techniques, fluids getting into the alternator, and serpentine belt problems.
Oil and dust contamination in an alternator can sometimes be cleaned away. However, this isn’t a 100% permanent fix, and you have to be especially careful not to get any fluids or grit in the alternator-bearing housing.
If an overly tight serpentine belt is to blame for your alternator woes, you might be able to adjust the tensioner arm enough to get the alternator pulley spinning smoothly. However, a newer car with an automatic tensioner will likely need the belt swapped out for a slightly larger one.
Most of the time, a bad alternator simply needs to be rebuilt or replaced. Thankfully, the cost of a replacement alternator has come down to the point where a capable DIY mechanic could replace their own alternator for a cost of around $150 and a few hours eaten out of a Saturday afternoon.
Written By
Jason Farrell
Jason Farrell is a certified master technician, the editor of Mechanic’s Diary in Pittsburgh, Pennsylvania. He is ASE (Automotive Service Excellence) certified and earned a Bachelor’s Degree in Automotive Technology from Pittsburg State University. With nearly 18 prior years of experience in the automotive field, he has extensive knowledge about Domestic, European, and other foreign makes and models of cars and light trucks. Jason’s experience working as a technician and service manager at dealerships, gave him the experience and know-how of most aspects of inspection, diagnosis, and repair from engine and drivability to electrical, HVAC, brakes, steering and suspension and everything in between.