
A properly functioning transmission should shift into drive, reverse, or first gear smoothly. So, if you suddenly find your car making a clunking noise when you shift into drive or reverse it’s a sure sign that there’s something that needs your attention.
First thoughts go to transmission problems like low transmission fluid or other transmission problems. Though it could also be a problem with an engine mount, transmission mount, or bad U-joints that have little to do with the actual inner workings of the transmission itself.
To track the source of the clunking sound when you shift into drive or reverse and what you might be able to do about it, we’re going to have to take a tour through the usual suspects. This includes what the transmission is trying to tell you, as well as some of the other possible component problems at play.
What Causes Clunking Noise When Shifting Into Gear
Several things can cause a clunking or jerking sensation when shifting a car into drive or reverse. Problems with transmission fluid, the TCM,or a sensor jump to mind first. Though you also have to consider other components responsible for bearing force in the car such as the transmission and motor mounts.
When determining the source of the clunking noise/feeling when shifting into gear it’s best to start by investigating the transmission.
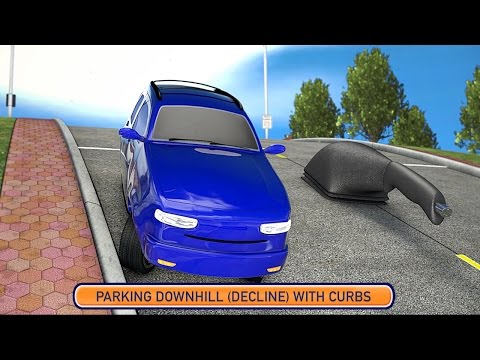
1. Terrain Issues or Parking at an Incline

When you put your car into park or into neutral with the parking brake on there’s naturally a little bit of play, and the car might even rock back a foot or two if you’re on an incline. The force of gravity is not pulling on the transmission and other components that hold the car in park.
When you take it out of park or neutral and release the parking brake, you have to fight against these forces a little. You’ll feel this in the shifter feeling a little bit like it’s jammed, before finally engaging in drive or reverse. As it does you might feel a clunk or a thump from around the floor pan of the footwell.
How to Deal with the Problem
If it is just a matter of the terrain, you shouldn’t feel this clunk at all when you park on a level surface.
In the future when parking on an incline, it might help to set the parking brake and then take your foot off the brake pedal. This will reduce the amount of force placed on the transmission when parked.
If you still feel the clunk when you park on a level surface and set off in drive or reverse again, then it’s likely something else at play.
2. Low Transmission Fluid

If you put an automatic transmission in drive or reverse and it hesitates to go into gear, then you feel a clunk or the car lurches, it might just be low transmission fluid. The transmission relies on a consistent level of pressure in the valve body and the shift solenoids to activate clutch packs and bands that put gears into play.
Low transmission fluid makes it hard for the transmission oil pump to buildup that pressure. When it finally does engage the transfer of force is hard causing a clunk. This might even be more pronounced if the engine RPMs are a little higher than normal if you stepped on the gas before the transmission went into gear.
In a case like this, the clunk will likely happen for both drive/first gear as well as reverse. You might even put it in drive, and set off only to have the transmission slip out into neutral when the oil pump can’t maintain the necessary level of pressure. You might also notice grinding noises from a lack of proper lubrication on the gears and the transmission is running hot.
How to Deal with Low Transmission Fluid
If your transmission has a dipstick you can check the levels in moments. Just bear in mind the temperature of the engine and transmission when it comes to determining if the fluid level should be at the COLD or HOT line.
If the dipstick is dry or the transmission is reasonably warm, but the mark is at the COLD line, then it’s likely low transmission fluid that’s causing the hard clunking shift into drive or reverse.
If it doesn’t have a dipstick, you’ll have to check it via the inspection port. This is a bolt at the side of the transmission housing. If you loosen it when the transmission is warm, but not hot, a tiny rivulet of pink transmission fluid should run out. If nothing comes out, then the fluid is low.
You can then add a small amount of transmission fluid, through the filler port at the top of the transmission. Give it a minute or two and then check the fluid levels again. Keep adding small doses until it reaches the correct line on the dipstick, or you start to see a tiny rivulet of transmission fluid coming out of the open inspection port.
The Bigger Problem
Let’s say you check your transmission fluid and it’s low. You top it up in little doses to keep it from being overfilled. The temptation is to wipe the sweat from your brow and think the clunking problem is solved.
However, transmissions are sealed systems, and the car doesn’t burn or use transmission fluid. So, it means you have a leak somewhere that needs to be fixed as soon as possible. Otherwise, the clunking problem is sure to return, bringing with it a whole bunch of other transmission issues.
3. A Bad TCU or Transmission Speed Sensor

If there’s a problem with the transmission control unit or one of the speed sensors it collects data from it can cause a hard shift that makes a clunking noise when you put it in drive. In a case like this, you might notice it trying to catch the gear when the engine is revving slightly higher than normal.
In a case like this, the transmission will likely act up in other ways. It might get stuck in a single gear. It might shift hard at higher revs for every gear, and struggle to downshift properly. Eventually, this will cause the ECU to turn on the check engine light and throw a code.
How to Deal with a TCU Problem
TCU and transmission sensor problems are best handled by a transmission specialist. The sensors are difficult to access without the right tools, and even if you could manage to replace a single faulting transmission speed sensor, chances are good there are other faults in the system that are beyond what the average DIY mechanic can diagnose of their own.
The part cost for a replacement transmission speed sensor is usually less than $100. Though the labor costs to replace a sensor can easily tack an extra $125 to $200 onto the final repair bill.
If a mechanic diagnoses the problem as a bad TCU it might be possible for them to reprogram it for around $150. Though this is rarely the case.
Usually, you have to have a transmission specialist completely replace the TCU. This starts with a parts cost of $200 to $500 for the TCU.
The labor cost to replace it then adds another $250 to $325, for a final repair bill topping out at $550 to $825.
4. A Bad Shift Solenoid

When one of your shift solenoids of the solenoid pack in an automatic transmission starts to fail, the shift into drive or reverse can be slow, and once it engages the gear grabs with a clunk. Drive and Reverse can sometimes share the same low-range solenoid A, which might explain why you’re getting a clunk just in those gears.
If the entire solenoid pack is bad, or there’s a major contamination issue with your transmission fluid, you would notice hesitation in all your gear changes. This will also cause serious hard shifting, hesitation, and possibly even gear grinding.
A bad shift solenoid tends to affect transmission and engine performance enough that a check engine or check transmission light comes on. This will throw a code that will help you troubleshoot where the problem lies.
Codes P0750, P0755, P0760, P0765, and P0770 indicate specific shift solenoids that are often labeled A thru E. Often there’s also a separate shift solenoid F that engages the clutch pack and bands for reverse.
How to Deal with a Bad Shift Solenoid
It’s rare for a single shift solenoid to go out on its own from basic wear and tear. Usually, there’s something else causing the problem such as degraded or contaminated transmission fluid. Low transmission fluid, as discussed early can also cause a shift solenoid to fail.
If you notice a problem with the transmission fluid, you might be able to get away with changing the transmission fluid, or having a mechanic perform a complete transmission flush and fill.
If the transmission fluid looks a semi-translucent normal pink, then there is likely a problem going on in the solenoid pack, and you’ll need a transmission specialist to take a look at it. This is usually a problem that’s beyond what the average DIY mechanic can handle on their own.
The good news is that this doesn’t require the expensive labor cost of opening the transmission housing. If you’re lucky and it’s just a single bad shift solenoid a specialist replace it for around $120 to $240.
This is roughly $25 to $100 for the replacement solenoid part, and then another $75 to $125 for the labor.
If the entire solenoid pack needs to be replaced, then you’re looking at a total repair bill of $250 to $650.
5. Bad Input Shaft Bearing

A clunking noise when you put it in gear can also be caused by a failing input shaft bearing. Sometimes called a clutch pilot bearing, it’s a special bearing inside a manual transmission that connects the transmission input shaft to the engine’s crankshaft.
When it starts to fail, the input shaft has excess play in it which makes it hard for the gears to synch up. When the gears do finally mesh the transmission makes a clunking sound as the gears are essentially forced together.
A bad input shaft bearing will also show up in other ways. This includes gears slipping for no obvious reason, as well as strange noises when you’re in neutral. You might even notice a strange hum that changes in time with the RPMs of the engine.
How to Deal with a Bad Input Bearing
If it’s a bad input shaft bearing that’s causing your car to make a clunking sound when you shift into drive or reverse, then you need to take it to a transmission specialist. This is usually beyond what a DIY mechanic can handle.
Even if you feel like you have the skills to do it, chances are good that the wear and tear caused by the failing input shaft bearing will likely have caused other damage inside the transmission, and might have also affected the crankshaft.
The cost for the new bearing itself is usually less than $50.
Though the labor costs to replace it will easily add another $300 to $400 or more.
Any other looming problems will just add to the final repair bill!
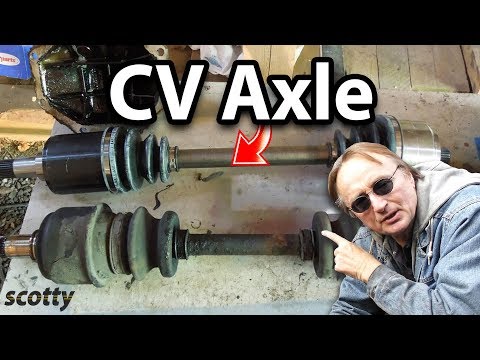
6. Worn Out CV Joints

Worn-out CV joints can make it hard for the torque of the transmission to be delivered smoothly to the wheels which can cause a clunking sound when you put it in drive or reverse and start to pull away. CV joints often fail when the protective boots surrounding them fail. The lack of lubrication and occasional road debris usually causes a baritone grinding noise that’s more pronounced when you turn a corner slowly.
If it’s just a single CV joint that’s failing you might also notice alignment issues. As it gets worse the car might even start to pull to one side mimicking a stuck brake caliper. If you drive on it long enough, the CV joint will eventually fail completely and/or lock up.
How to Deal with the Worn-Out CV Joints
Once a CV joint starts to fail, it needs to be replaced. This usually pushes the limits of what a DIY mechanic can handle.
Compounding the technical nature of the fix, most CV joint problems also have a bad axle seal in the mix. This can also cause your transmission fluid to be a little low. Especially if you procrastinated getting it fixed.
The part cost for a new CV joint can vary, though with most domestic models you’re looking at a parts cost of around $125 to $175 per axle.Though in larger vehicles, pickup trucks, and high-performance cars, the part cost can be much higher.
A mechanic will usually add on another $125 to $150 in labor costs. This brings the average repair bill to around $250 to $325.
If the axle seals also need to be replaced, you can expect an additional parts cost of $50 to $75. Though since the mechanic is already working on the CV joint, there shouldn’t be any serious boost in the cost of labor.
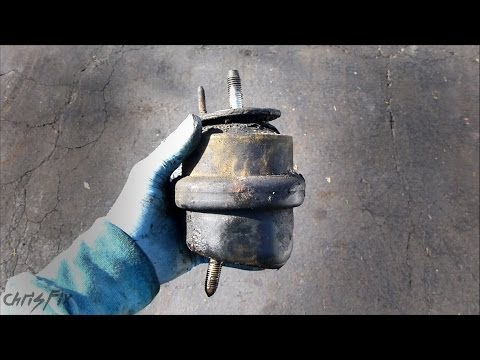
7. Bad Engine or Transmission Mounts

When an engine or transmission mount starts to fail, it can’t buffer the forces of the engine on the frame when the car goes into gear causing a hard clunking sound. Most cars have multiple mounts for the transmission and engine. They’re made from steel and robust reinforced rubber or urethane bushings. They’re bolted to the frame of the car to act as a buffer as well as a support system for the engine and transmission.
Unfortunately, the rubber components can break down overtime, and the steel components can be vulnerable to rust. When one starts to fail it can cause excess vibrations and heavy clunking sensations when you put the transmission into gear. If an engine or transmission mount gets really bad you might even feel the clunking when you accelerate or brake hard.
How to Deal with Bad Engine or Transmission Mounts
Usually, you can spot a bad engine or transmission mount with a basic visual inspection. If you aren’t sure where your mounts are, you can usually find their model in your owner’s manual or repair guide.
You’re looking for visibly cracked or rotten-looking rubber, the mount feeling loose and the rubber at the edge of the mount looking rotten. Severe rust and crumbling metal are also a sure sign that you have a mount going bad or have completely failed.
A reasonably skilled DIY mechanic might be able to replace a bad transmission or engine mount. It’s a job that doesn’t require any special tools.
Though the biggest challenge is strategically placing jacks to make sure that the engine and transmission are properly supported while you replace the mount. If you get something wrong, and a jack slips or kicks out under the weight it could cause severe damage to very expensive components. Rust on the bolts can also cause the bad mounts to become stubbornly stuck to the frame.
When you consider that it’s a reasonably low cost to have a mechanic replace one or all of your bad transmission or engine mounts. It might make more sense to let the professionals handle it.
The parts cost for a new engine or transmission mount is usually between $125 to $175.
If you want to do it yourself, you can expect it to completely eat a Saturday afternoon.
The cost to have a mechanic replace bad transmission or engine mounts will add another $125 to $150 to the final repair bill of $250 to $350.
8. Torque Support Arms

If the torque control arms in your car’s suspension system are loose or badly compromised by rust, the force from putting the transmission indrive or reverse can cause a strange clunk. The primary function of torque control arms is to curtail axle housing rotation and prevent axle wrap.
A loose torque support arm can also cause a strange clunking sound when you decelerate. You’ll likely also notice increased road noise as the loose suspension system components start to rattle when you go over bumps or potholes. You might even notice the car seems increasingly bouncy and has more body roll in the corners.
If you drive with a bad torque control arm for long enough, the gradual shift in alignment will likely also cause your tires to wear abnormally leading to bald sections of tread and cracking in the rubber.
How to Deal with the Bad Torque Support Arms
If you’re lucky the clunking sound of a bad torque support arm is the product of a loose bolt connecting it to the frame or the rest of the suspension system. If you can find it yourself, you might be able to simply tighten it.
Though most of the time, the entire torque support arm needs to be completely replaced. This is a labor-intensive job, but if you have the jacks and tools to pull it off, a reasonably skilled DIY mechanic could handle the repair without needing to take the car in to a mechanic. Though if one has gone out, chances are good you have to replace both on that axle.
The parts cost for a new torque support arm ranges from $325 to $400.
If you have a mechanic handle the replacement you can expect to add another $125 to $175 to the final repair bill.
Though the real concern here is that chances are good the torque control arm problem also stressed out and damaged other suspension components. Chances are good that the mechanic will, correctly, advise replacing the shock and/or struts.
This is sort of a wise move, as they’re already tearing the suspension system apart. So, the added labor cost will probably be less than $100.
Then the cost of the parts for new struts and shocks will add another $125 to $200 to the final repair bill.
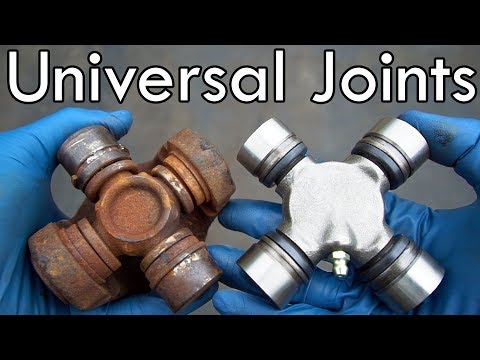
9. Bad U-Joints

Bad U-joints in a rear-wheel drive car that doesn’t let the driveshaft move up and down smoothly can cause a delayed clunk when you put the car into reverse or drive and step on the gas. They allow the driveshaft to move while in gear and rolling down the road and help make up the difference in height between the transmission’s output shaft and the rear axle.
The clunking of bad U-joints usually feels like it’s coming from behind your seat or the back floor pan of the car. It might also start to make a baritone vibration that seems to come and go at certain speeds. This vibration will be stronger in the center of the car directly above the driveshaft and U-joints.
How to Deal with Bad U-Joints
To confirm that it is indeed bad U-joints causing the clunking sound when you put it in gear, you have to crawl under the car to inspect them. Depending on how much ground clearance you have, this might mean jacking up and blocking off the car first!
Check to see if the retaining clips are in place and if the U-joint is smooth.
If the retaining clips are missing or damaged, you might get lucky and you can simply replace them. Most auto parts stores will have them for around $20 to $30.
If the U-joints are pushed outward or the rubber caps inside the U-joint look dry-rotted or are altogether missing then water likely got into the bearings and corroded them.
Another way to confirm your suspicion of bad U-joints is to firmly grab the drive shaft and try to move it both side to side as well as up and down. It should be rock solid and shouldn’t budge.
Replacing your U-joints is within the skills of what an average DIY mechanic can handle. Though the problem is that you often need a special press tool, which most people don’t have, and it’s prohibitively expensive to buy for a one-time repair.
If you’re lucky, your local auto parts store might have a press kit that you can rent for next to nothing. Then you’re just looking at a parts cost of less than $50 per U-joint.
Otherwise having a mechanic replace your U-joints will cost you around $250 to $350 for parts and labor.
10. A Bad Rear Differential

A differential problem can cause a clunking noise when you put the car in gear due to a worn-out pinion gear, bad pinion bearings or the splines of the gear teeth not meeting properly. This usually comes along with a strange whine or a howling noise from the back of the car when you’re in drive or reverse, but not when you’re in neutral.
A lot of times a differential problem will act up worst when you take a tight turn. You’ll hear the gear grinding noise, and the steering might feel stiff. Depending on the road surface you might also hear one of the tires bark or squeal for a split second. If you drive with a bad differential long enough, you might start to notice excess or uneven wear on the rear tires.
How to Deal with a Bad Rear Differential
There are a few different ways to repair a rear differential that’s causing a clunking sound when you put the car in gear. This might include replacing the gasket and re-lubricating the differential gears. Sometimes it calls for replacing the rear pinon seal or the differential side seals. Hopefully, you caught the problem before the entire rear differential needed to be replaced!
Unfortunately, all of these jobs are best performed by the hands of a certified mechanic.
A rear differential gasket is usually made from silicone or rubber which can deteriorate and leak lubricant. The labor time here is usually an hour to an hour and a half, with a parts cost of around $75, and a final bill of around $175.
A bad rear differential pinion seal is also made from rubber and a leak here typically affects the yoke that attaches to the driveshaft. It takes a little bit more time to repair since the yoke usually also needs to be removed, and the seal can be stubborn to pry out.
The parts cost for a new rear differential pinion seal ranges from $75 to $100.
The labor cost of $175 to $225 adds up to a final repair cost of $250 to $325.
Differential side seals are designed to prevent the differential fluid from leaking onto the rear brakes. When these seals go, the rear axle shafts also need to be removed. The leaking seals then need to be pried out and new ones installed.
The part cost to replace differential side seals ranges from $85 to $175.
The labor cost adds another $200 to $275 to the final repair bill of $285 to $450.
Frequently Asked Questions
Can a High Idle Cause Clunking Noises?
If your idle is running above 1,000 to 1,200 RPMs when you have the transmission in drive or reverse it can cause the gear to finally catch with a clunking sound. Make sure not to rev the engine before putting it in gear. If your car is idling high on its own, you might need to get the idle adjusted before the jarring forces of putting it in gear damages the engine or transmission. Chances are good this is a problem with the idle air control valve or a MAP sensor.
Can Shifting Too Fast From Reverse to Drive Damage the Transmission
If you have a bad habit of reversing quickly and then slapping the transmission into drive, you’ll often hear a clunking sound as the relationship between the input and output gear changes. Ideally, you should only change gears from reverse to drive when the car is stopped. Though most automakers engineer their transmissions to be safe to shift at 5 MPH or below.
Conclusion
A clunking sound when you shift into drive or reverse might be something as minor as the gear’s grabbing hard when you’re parked on an incline. If the parking brake was also on, it might just be a stubborn release.
Though if you can’t immediately find the reason why the car clunked or jerked when you put it into gear, it behooves you to look into some of the more likely suspects.
Start with a quick check of your transmission fluid. If it’s low, the gears will hesitate to change and will likely catch at the wrong RPMs. Though if it is low, it means you have a leak somewhere.
While crawling around under the car and checking around the transmission, also take a moment to check the CV boots, the axle seals, the suspension system torque control arms, the U-joints, and the rear differential. If you see cracked seals or signs of lubrication leaking, then chances are good you’ve dialed in your problem.
If you’re mechanically inclined and/or you can get your hands on the right tools, you might be able to fix problems like bad U-joints, and bad transmission mounts or tighten the bolts on a loose torque control arm. Though more serious problems likely mean you’re taking a somewhat expensive trip to the mechanic.
Written By
Jason Farrell
Jason Farrell is a certified master technician, the editor of Mechanic’s Diary in Pittsburgh, Pennsylvania. He is ASE (Automotive Service Excellence) certified and earned a Bachelor’s Degree in Automotive Technology from Pittsburg State University. With nearly 18 prior years of experience in the automotive field, he has extensive knowledge about Domestic, European, and other foreign makes and models of cars and light trucks. Jason’s experience working as a technician and service manager at dealerships, gave him the experience and know-how of most aspects of inspection, diagnosis, and repair from engine and drivability to electrical, HVAC, brakes, steering and suspension and everything in between.