
If you have a modern-day car that’s less than 10 years old, chances are you don’t worry about your distributor cap. Nor should you, almost all newer vehicles have either a coil-on-plug (COP) or ignition coil pack. Of these, the modern-day ignition coil pack is a very close analog or even an updated version of a distributor cap.
If you have a car that’s more than 10 years old, with a distributor cap and you’ve been having problems like hard starting, the engine not starting, or recurring engine misfires, it might just be a bad distributor cap or distributor rotor.
To find out if it’s truly a problem with a bad or failing distributor cap, we’re going to have to pop the hood on the nuts-and-bolts details of engines from this era. Along the way, we’ll need to explore common signs of a bad distributor rotor and cap as well as what you might be able to do to fix the problem.
What Does The Distributor Cap Do?

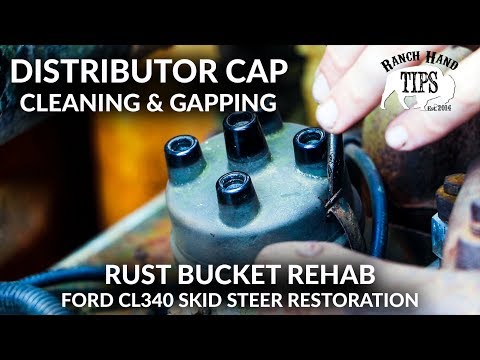
Distributor caps play a critical role in somewhat older cars by precisely releasing the correct amount of electrical current, on time, to each cylinder’s spark plug in time with the cycle of the engine’s piston strokes. The precisely timed spark then ignites the fuel/air mixture.
Within the distributor cap, there is a special rotor arm that is connected to the ignition coil via a spring-loaded brush in the distributor cap. High voltage electrical current from the engine is sent to the rotor causing it to turn and the correct amount of power is sent to individual electrodes located inside the distributor cap.
Top Symptoms And Warning Signs of a Bad or Failing Distributor Rotor & Cap
Early signs of a failing distributor cap like hard starting and a rough idle can often go unnoticed, but as time goes on and the signs of a failing distributor rotor and cap become more obvious, requiring your immediate attention.
1. Hard Starting

Hard starting is one of the earliest signs of a bad or failing distributor cap as the spark isn’t being consistently delivered to all the cylinders on time to maintain vigorous internal combustion. The amount of time the engine attempts to crank before fully turning over might start out small, and become increasingly longer as the failing distributor rotor gets worse.
It’s easy to tell yourself at first that it’s just because the weather is cold, or something is out of tune with the engine. This is why hard starting often gets ignored in the early stages of a worsening distributor cap problem.
Though it’s worth bearing in mind that moisture from fog or rainy conditions when a car starts hard is one of the more common symptoms of a bad distributor cap. This is often a sign that moisture is able to infiltrate the distributor cap itself fouling the system and eventually causing corrosion on the wiring.
2. A Rough Idle

A rough idle is a companion symptom of a failing distributor cap and usually happens in tandem with hard starting. At times the electrical spark being delivered can be just slightly out of time, causing a minor vibration, that’s easy to ignore.
Then there are other times, that seemingly come out of nowhere when the hard idle from a failing distributor rotor feels like the engine itself is trying to shake the car.
3. Stalling

The miss-timed spark or the failing distributor rotor not sending the spark to the plugs often leads to random stalling problems. This might start out as a minor stall when sitting where you can start the car right back up again. Though as the bad distributor cap problem worsens, you’ll inevitably end up having random stalls when accelerating hard or at other inopportune times.
4. Misfiring

Misfiring is one of the more salient signs of a failing or bad distributor rotor and cap. This is the point where the rotor arm’s failure to deliver a consistently on-time spark leaves unburned fuel in the combustion chamber of one or more cylinders.
You often notice misfires occurring when you have to accelerate hard when you need to merge up to highway speed. Only to have the engine shake, cough, and shudder the car. It might even cause the engine to stall altogether and could even damage your catalytic converter as unburned fuel migrates from the cylinders to the exhaust system.
5. The Engine Cranks but Won’t Start

An engine that cranks but won’t start is often a sign of a bad distributor cap with severe carbon tracking, cracks, or a badly failing rotor arm. Even if you do manage to get the car to turn over without burning out the starter motor, you’ll know this is a serious problem, and you shouldn’t drive the car unless it’s an emergency. You would want to risk an unforeseen stall leaving you stranded.
This is even more likely to be an issue in moist, foggy, or highly humid conditions. A failing distributor cap can sometimes allow moisture inside which can foul the spark and corrode electrical components.
If your car has been starting hard, has a rough idle, and sometimes stalls, then suddenly cranks but won’t start during moist weather, your suspicions about a bad or failing distributor cap should rise sharply!
6. Check Engine Light

All the misfiring and timing issues caused by a bad or failing distributor rotor and cap will eventually cause the car’s ECU to throw a code, which turns on the check engine light. Though the codes the ECU throws are usually related to specific cylinders or spark plugs having a problem, which can be difficult for a layman mechanic to interpret as a bad or failing distributor cap.
7. Knocking & Other Strange Noises

A failing distributor rotor can start to make tiny knocking noises or other strange sounds as it fails to deliver a spark or can’t effectively rotate through the cycle with precision. This usually happens in tandem with misfires in the cylinders and unburned fuel getting into the exhaust system.
What Causes of a Bad or Failing Distributor Cap
A distributor rotor and distributor cap go through a lot of high-voltage interactions, which gives them a limited lifespan. The average lifespan of a distributor cap is roughly around 30,000 to 40,000 miles. This is one of the reasons why they were phased out in place of coil packs and COP ignition coils which can last 75,000 to 100,000 miles or more.
Of course, several things can lead to problems in a distributor cap before the 30,000 to 40,000 miles mark such as:
1. Exposure to Moisture

Driving through a deep puddle, or water getting up under your engine bay is one of the more common causes of a bad or failing distributor cap. If the event is bad enough the water can infiltrate the distributor cap causing shorts in the electrical components.
Though even frequent exposure to moisture, fog, and high humidity can also accelerate the aging process of a distributor rotor and distributor cap. Even something like a persistent exposure to humid salt air might lead to increased corrosion within the distributor cap’s metal electrical components.
2. Cracks in the Distributor Cap

Deep freezing winter temperatures and the sudden onrush of engine heat can cause cracks in the distributor cap’s housing. This can cause minor imperfections in the distributor rotor’s timed release of the spark leading to hesitations in acceleration, rough idle, misfires, and more.
Though even if the crack itself is minor and doesn’t affect distributor rotor performance, it can serve as an entry point for moisture, water, and even high humidity to invade the interior of the distributor cap. As time goes on this can lead to corrosion issues that accelerate the eventual death of a failing distributor cap.
3. Corroded or Burned Terminals

The constant exposure to high voltage and possible corrosion issues can lead the distributor rotor to skip a cylinder in the firing order. This can be compounded by excessive carbon buildup and/or oxidation. As the corrosion progresses the symptoms of a bad or failing distributor cap will worsen.
4. Grease and/or Carbon Buildup

Carbon buildup and grease that develops within the distributor cap housing can also cause a bad or failing distributor rotor. Just like corrosion on the electrical components, this residue can build up to the point that it can cause the engine to skip a cylinder in the firing order.
How to Diagnose a Bad or Failing Distributor Cap
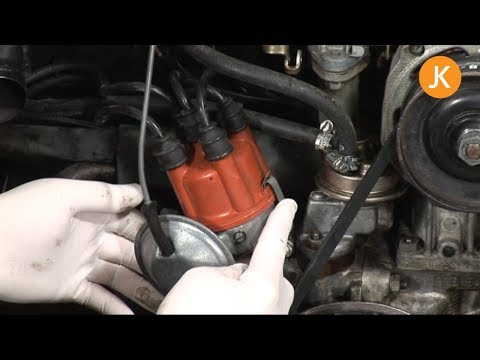
If you’ve been noticing common signs of a bad distributor cap such as hard idling, hard starting, stalling, and misfires, then the wise move is to confirm the diagnosis before more serious problems arise. This is the sort of thing you can do yourself with some basic tools like a ratchet a magnetic-tipped screwdriver, a spare spark plug with a spark tester, as well as a multimeter or a voltmeter.
If you find exterior faults in the housing, it’s a strong bet that the distributor cap is failing, and can have problems with moisture.
Any carbon traces your find are likely linked to past misfires and the distributor cap needs to be repaired or replaced.
If you see gray streaks going from one contact point to the next, the distributor cap is bad enough to the point that it needs to be replaced.
If the spark tester doesn’t detect a spark, you’ll need to also check the coil.
If the test light flashes, the coil isn’t working properly. If you don’t get any flashes or sparks, then you might also have a problem with the ignition system’s electrical wiring.
How to Fix Distributor Cap Problems
If you’ve confirmed that you have a bad or failing distributor cap, then the next step is to determine if you can clean and fix it or if it needs to be completely replaced.
If your assessment finds that the housing is strong and all the components move correctly, but corrosion on the electrical components is causing the symptoms of a bad distributor cap, then you might be able to clean it. Otherwise, the smart move is to simply replace the failing distributor cap altogether.
How to Clean a Corroded or Dirty Distributor Cap
Cleaning grime, carbon deposits, or corrosion from a failing distributor cap is something that the average home mechanic can do on their own. This requires some basic tools you already have, a dry electronic cleaner spray, and about a half hour of your time with the following steps.
How to Replace Your Distributor Cap
Replacing a bad distributor cap is within range of what most home mechanics can do. A new replacement distributor cap is relatively cheap and takes only a little longer to install than all the time you might spend trying to clean a failing distributor cap.
Once you’ve sourced the parts and assembled some basic automotive tools you can replace your bad distributor cap with the following steps.
Distributor Cap Replacement Cost

The part cost for a replacement distributor cap is relatively low, ranging from $35 to $75. Most capable DIY mechanics can handle replacing a bad or failing distributor cap in a few hours to save the labor cost of a professional mechanic.
If you feel that replacing your own distributor cap is beyond your depth of skills, there’s no shame in having a mechanic handle the job.
The cost to have a mechanic replace your distributor cap ranges from $75 to $125 for parts and labor.
Frequently Asked Questions
Can a Bad Distributor Cap Damage My Car?
A failing distributor cap that’s causing hard starting and a rough idle isn’t a driving safety emergency. Though if the bad distributor cap starts causing misfires, stalling problems, and the check engine light to come on, it is no longer safe to drive.
Not only could it leave you stranded, but it could damage the cylinders. Unburned fuel from misfires that makes its way through the exhaust system to the catalytic converter can cause serious, expensive damage.
Is a Replacement Distributor Cap Hard to Find?
If your car is less than 25 years old and has a bad or failing distributor cap, most auto parts stores will carry a replacement part, or can get you one within a day or two. If you have an older car with a bad or failing distributor cap, then you might need to order it online through a parts dealer site.
Conclusion
The early symptoms of a bad or failing distributor rotor and cap usually manifest as hard starting and a rough idle. If they unnoticed or ignored a failing distributor cap will worsen into other more serious symptoms such as stalling, misfires, and a worrisome check engine light.
You can usually diagnose a bad or failing distributor cap with a simple at-home test with a multimeter or spark tester. While you might be able to clean a failing distributor cap, the easier answer is simply to replace it. This is something a modestly capable DIY mechanic can do in a few hours for less than $100 for the parts.
Written By
Jason Farrell
Jason Farrell is a certified master technician, the editor of Mechanic’s Diary in Pittsburgh, Pennsylvania. He is ASE (Automotive Service Excellence) certified and earned a Bachelor’s Degree in Automotive Technology from Pittsburg State University. With nearly 18 prior years of experience in the automotive field, he has extensive knowledge about Domestic, European, and other foreign makes and models of cars and light trucks. Jason’s experience working as a technician and service manager at dealerships, gave him the experience and know-how of most aspects of inspection, diagnosis, and repair from engine and drivability to electrical, HVAC, brakes, steering and suspension and everything in between.